ikea rocking chair footstool

July 31st, 2013 | Materials: 2 Poangs and a shockabsorber Description: Bolted two Poangs to each other and turned an armrest into the very New life for Old Poang! June 6th, 2013 | Materials: Poang Chair, Fence boards, drywall screws Description: Poang… That iconic chair from IKEA, what do I do when August 9th, 2012 | Materials: Poang, timber, Fret G clamps, chisel, timber stain Description: I’m too lazy to hold my iPad It’s basically a Poang to iMac table April 10th, 2012 | Materials: Poang chair Description: POANG chair, unarmed. I take the wooden structure, discard the rest. Place a base on which March 4th, 2012 | Materials: Ikea Poang chair, handcarved stamps, textile paintDescription: I carved some cloudstamps and decorated my white Poang chair with it February 8th, 2012 | Materials: Leather Rover car seat and Ikea Poang chair frame Description: I was inspired by Ron Arad’s 1981 Rover chair, November 18th, 2011 |

Materials: Poang chair & footstoolDescription: We all love Poang chairs. Unfortunately, their design can make you have a position so September 18th, 2011 | Materials: 1 Lack side table + 1 Poang footstool cushion + glue Description: Our little flat is almost 100% Ikea POANG IKEA powered GT5 racing cockpit August 30th, 2011 | Materials: POANG chair, VIKA OLEBY, as-is Table top, wheels ,shelf tops and good idea Description: 1. Mark all spots on August 21st, 2011 | Materials: Poang armchair, posters Description: My Toronto School of Art collage class was collecting posters from telephone poles, when Used but in very good condition, cream chair cushion with no marks or stains (red cushions not included) From a non smoking household with no pets. I must confess: IKEA Poang chair is among my favorite pieces by this brand because it’s modern and stylish, its layer-glued bent birch frame gives comfortable resilience. Soft, durable and easy care leather is practical for families with children.

A variety of seat cushion designs makes it easy to change the look of your chair. The high back provides good support for your neck. To sit even more comfortably and relaxed, you can use the armchair together with a Poang ottoman. There are so many advantages, aren’t there? Besides, you may this chair in various spaces and for various purposes as it’s an IKEA piece and such furniture can always be hacked. Poang chair may be used in living rooms, nurseries, reading nooks, home offices, dining rooms and of course, terraces and patios. It’s a great relaxing piece that can easily match almost any décor and style due to its versatility. Poang chair can be renovated in lots of interesting ways. The easiest idea is repaint the frame in the color you like to refresh the look of the chair or in case it has some scratches. If you are good at sewing, make a new slipcover for your Poang depending on the interior and décor style you have. You may also add some foam inside to make it a bit softer.

Make it nautical, blush, bold, patterned, color blocked (that’s very trendy) or any other you want. Make the frame and the cover contrasting for a cooler look. Add a couple of cushions, faux fur, a sheepskin and you’ll get nearly a new Poang! If you are up for some more profound changes, turn your Poang chair into a rocker! It’ll become even more relaxing this way. An armrest attached to the Poang chair will give you some space for placing your tablet, cup or glasses.
barber chair parts wholesaleChange it completely turning into a hammock-style seating with some faux leather.
table and chair rentals near beverly maWanna see all the possible DIY hacks?
second hand canteen chairs for sale
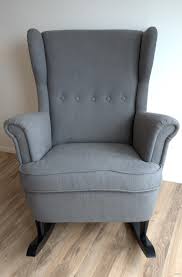
2010-2017 © by Joy Kelley | I'm a HowJoyful DesignToday’s post brings me great pleasure to share! It’s a secret project I’ve been working on since I was 7 weeks pregnant. It is my first DIY project for baby Crowder. (First person to come up with a solid nickname for the IBK Fetus gets a prize!) I’ve always been in love with wingback rockers. You might as well trade your first born child for one, and then, what’s the point?!
folding chair rental tampaThe rocker on the left came from Nurseryworks, and the rocker on the right is from Pottery Barn Kids.
ikea high chair $25 And then, it hit me hard like my pregnant emotions during country music.
massage chair for rent manilaI could EASILY make my own wingback rocker.
where to buy adirondack chairs in sydney
All I would need to do is find a wingback chair, and some rocking chair runners. It was so simple. I thought “surely, this has been done a million times.” But I googled it hard, and didn’t find anything on the matter. (But in the Internet’s defense, my googling skillz are weak like a teenage girl at a One Direction concert.) We picked up the Strandmon Wingback chair from IKEA, for $279.
fisher price luv u zoo high chair cover I looked online and found a place that sells unfinished wood rocking chair runners.
leander high chair safetyI order a pair of adult large in maple. We measured where we would need to drill holes for the legs to attach to the runners. The holes need to be 1&1/8″ in diameter. The center of that hole needs to be 7 1/2″ in from each end.
The hole needs to be 3/4″ deep. **DISCLAIMER** Double check those measurements by holding up your runners to the legs of the chair to make sure it ‘dry fits.’ It has been brought to my attention that there is variation in the legs of the Strandmon, and my measurements might not be a perfect fit for your chair. We used the drill press at my parents’ house. But if you have a cordless drill, you can use a forstner bit to drill the same kind of hole. My two favorite men! I spent countless hours in this shop, learning the ways of woodworking and DIY from a great teacher. We brought the runners home and fitted them to the chair. Fit like a glove. Now we had to match the runners to the legs of the chair. Instead of painting the runners, I thought it would look better if we stained them black. I will admit, I did help with staining. BUT I was very careful to not get it on me (and when I did, I scrubbed it right off), and we had all the windows open, with a fan going.

Aaron did most of the staining. The wood was so blond, it took several coats. This is how thin it still looked after the first coat. Several coats later, it was looking like a dead match to the legs of the Strandmon. We used a matte poly finish. I love this poly. And it has a soft touch. I don’t know how to explain it, but it is magical. Buy it and try it. After they were dry, it was just a matter of attaching the runners to the chair. We put the runners in place, and drilled a skinny little pilot hole to make sure the wood didn’t crack when we put the screws in. Let’s take a minute to talk about how much Buster loves the chair being upside down. Here’s a montage of Buster in his fort, on several different days. Now that your heart is sufficiently melted, we can get back to the real work. Then we switched out for a bigger drill bit to make a hole (not all the way down! Just slightly below the surface) the same size of the screw head to counter sink the screw.

Then we sanded the bottoms of the feet, and coated the holes in the runners with wood glue. After we put the runners in place, with the wood glue, we use spax screws and secured the runners. We filled the holes with black wood putty. And now, it’s ready to rock. And let me tell you, it rocks like you wouldn’t believe. It’s probably as good as Neil Armstrong’s first steps on the moon. Or when Adele came out of the womb singing her feelings. You sit in this chair, and you just have a good feeling about life. There is no real “skill level” required for this project. It’s just about taking the time to measure. No major tools are required. The simplicity of this project blows me away. This is a DIY project the average person can easily take on. The result is incredible and classy. And for a little designing on a dime and high/low comparing: And if you really love this project, please think about pinning it. For your pinning sake, here are a few more images to choose from 🙂